OSRS Lunar Diplomacy
Jun-05-2022 PSTIntroduction
Lunar Diplomacy revolves around the rivalry between the Moon Clan and the Fremenniks. Completing the quest will grant you a number of rewards, along with access to the Lunar Isle and Lunar Spell Book.
Requirements
You’ll need the following skill – 55 Woodcutting, 65 Magic, 49 Fire Making, 61 Crafting, 40 Defense, 5 herblore, and 60 Mining. You’ll also need the combat level to kill several level-111 monsters. Besides that, you need access to the Air, Water, Earth, and Fire Altars.
You’ll need to have completed the following quests – Shilo Village, Druidic Ritual, Lost City, Jungle Potion, The Fremennik Trials, and Rune Mysteries.
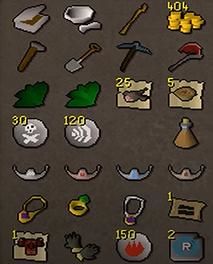
You’ll need the following items – Tinderbox, 1,000 Gold Coins, Guam Leaf, Marrentill, Pestle & Mortar, and a Hammer. The items that can be obtained during the quest are; 2x Spools of Thread, Needle, Axe, Pickaxe, Spade, and Swamp Tar. You’ll also need Air, Water, Earth, and Fire Talismans unless you can access the Abyss. Lastly, a Dramen Staff and Combat Equipment is mandatory.
Here are the recommended items that’ll help you along your journey – Rimmington Teleport, Rellekka Teleport, Runes for the boss fight, and Emerald Lantern to bypass traveling to Rimmington.
Walkthrough
You can start the quest by speaking to Lokar Searunner at the western docks of Rellekka. Now, gain the Seal of Passage by speaking to Brundt the Chieftain at the Long Hall. Keep the passage on your during the entire quest, or else you’ll be sent back to Rellekka.
The Ship

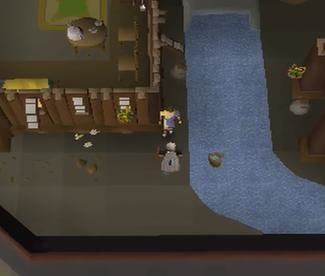
Go back to Lokar Searunner to sail to the Pirates’ Cove. Get into the naval vessel called Lady Zay from the top dock, and be careful because you’ll encounter a few pirates and moss giants here. Once they’re dealt with, you can speak to Captain Bentley, followed by Birds-Eye Jack on the lower deck.

You need to go speak to both the NPCs back and forth. So, you’ll need to speak to them in this order: Bentley – Jack – Bentley. Once Captain Bentley suggests you speak to the other crew members, you need to locate Eagle-Eye Schultz on the same deck, followed by Cabin Boy on the upper deck, and Beefy Burns on the lower deck.
Now, go back to where the Cabin Boy was located to speak to Lecherous Lee, then back to the captain’s deck to speak to First Mate Davey-Boy. Finally, you need to speak to the Cabin Boy again.
The Symbols
Since you now have the information of where the Jinxes came from for lunar diplomacy osrs. You need to use a Tinderbox to light your Emerald Lantern (if you have followed the requirements mentioned above). You can pick Swamp Tar near the ladder on the lower deck. Now, it’s time to wipe the five symbols.
The first is on the cannon east of the Cabin Boy. The second is on the captain’s deck, which is on a wall chart to the northwest direction. You need to use your lantern. Now, head to the lower deck again and go near the staircase to find the third symbol. On the same deck, near the Cook, you can find the fourth symbol on a crate. And, the final symbol is also on the same deck, which is on a support column.
The Moon Clan Island
Speak to the Captain once you have located all the symbols, and set sail for the Moon Clan Island. You need to head southwest to locate Meteors, who will ask you to speak to Oneiromancer for help.
The Waking Sleep Potion
You can find Oneiromancer near the Astral Altar, and she’ll ask you to collect a number of items. You need to first find the Waking Sleep potion, and for that, you’ll need a Suqah Tooth, Guam Leaf, Pestle & Mortar, and Marrentill. Locate the chicken house in the village and speak to Baba Yaga, who will give you a bottle for the potion.
Fill the vial with water and go southeast to kill a Suqah for its tooth. Take its hides too as you’ll need it later in the quest. Use your Pestle & Mortar to make a Ground Tooth and add it into the vial. Finally, go back to the Oneiromancer and hand her the potion.
The Lunar Staff

You’ll need a Dramen Staff and four Elemental Talismans or Tiaras to make a Lunar Staff. Take the staff to each of the four Elemental Altars in the following order – Air, Fire, Water, and Earth. You won’t be able to wield it without the Ceremonial Clothing. Hand the staff over to the Oneiromancer.
The Ceremonial Clothing
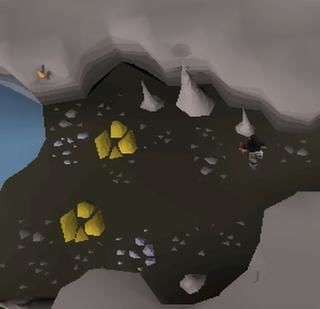
There are eight different pieces that you need to obtain. Travel to the northeast part of the island to locate a dungeon, and remember to take your Pickaxe and Hammer with you. Get Lunar Ore here by mining Stalagmite, and then head back to Rellekka to use the Furnace and Anvil to make the Helm.
The Cape can be obtained from Pauline Polaris, who is located in the northwestern part of the village. You need to guess her name correctly, which will obviously be Pauline, but right after that she’ll give you a clue and you need to choose Jane Blud-Hagic-Maid.
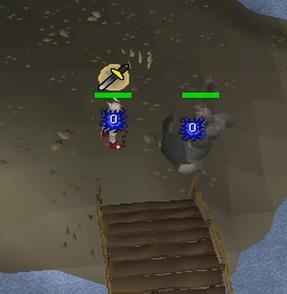
Go back and visit Meteora, who is willing to trade you the Amulet in exchange for a Tiara that she lost to a Suqah. Start killing them to eventually get it in the form of a drop and swap it for the Amulet.
The Torso, Legs, Gloves, and Boots can be acquired by speaking to Rimae Sirsalis in the clothes shop. Using your gathered hides, you can have them tanned for 400 coins from her. Use your Needle & Thread on the Suqah Leather to craft the four items.
The Ring can be found at the center of the village, where you’ll be given a riddle by the NPC named Selene. Take your spade to the bottom of the village and go left to locate a bridge. Dig on the blue flowers to obtain the ring.
Finally, take all the items to the Oneiromancer to get all your items back.
The Dream World

Go back to the village and use the bank to take the Runes that you’ll need during combat. Also, bring Tinderbox, Axe, and Food with you. Equip the Lunar equipment you got back and head to the building that is to the west. You’ll find staircases within the building and a ceremonial brazier. Use the Waking Sleep Potion on the Kindling you received, light the Brazier with a Tinderbox, and then the Kindling on the Brazier.

Once you’re inside, go to the middle and speak to the Ethereal Man or Lady, where you’ll now be asked to solve six different puzzles. Each one of the puzzles is found within the portals located in the same area. Also, after every puzzle that has been successfully solved, you need to go back and speak to them.
Puzzle #1

Ethereal Fluke challenge can be found on the southwest platform. It’s a dice game where you need to find the dice that has only two combinations, with the center dice being 1 or 6, eastern dice being 4 or 3, and western dice being 5 or 2. The objective is to add the numbers given to you in the dream guide.
Puzzle #2

Ethereal Numerator challenge can be found on the southeast platform. You need to press floating numbers in the correct order, where the numbers pressed are the ones missing from the sequence. For instance, you can see a sequence of 1,3,5,6, so the numbers missing are 2 and 4.
Puzzle #3

Ethereal Perceptive challenge can be found on the northeast platform. A Woodcutting game, where you need to chop more wood than the Ethereal Perceptive. The first person to get 20 logs in the Log Deposit Pile wins.
Puzzle #4

Ethereal Guide challenge can be found on the northwest platform. A memory test where you have to hop between platforms to complete the challenge. You need to avoid the fake platform as much as possible.
Puzzle #5

Hurdle Race challenge is a straightforward Agility test, and you’ll easily complete it if you have an Agility potion on you. The objective is to leap over four hurdles to win the race.
Puzzle #6

Ethereal Mimic challenge is where you have to mimic by copying the emotes that the Ethereal does. After each performed emote, the mimic will either nod to indicate that you were correct, or shake to indicate that you were wrong.
The Boss
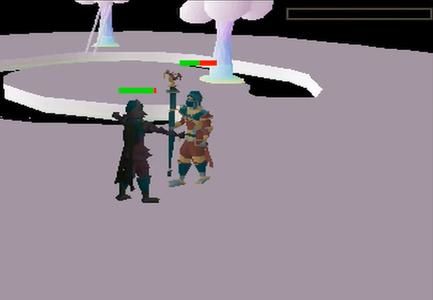
Once you have overcome the six challenges, you need to go back to the center and speak to the guide, where you’ll be asked to face the ultimate challenge. The challenge is to defeat yourself, who is a level 79 mirror image that is geared to the stats same as you. The battle is fairly easy, aside from the fact that you’ll be transported to different tiles of the arena. Once ‘Me’ is dead, you can speak to the guide again, followed by the Oneiromancer to complete the quest.
By the way, RSgoldfast provide osrs gold, rs3 gold, runescape items, quest service and so on, easy & safe & fast, have a happy time, thank you for reading.